
If you're planning a new deck or patio renovation, adding a **remote control pergola roof** is one of the smartest upgrades you can wire for. I've helped half a dozen homeowners retrofit these later, and trust me—running the low-voltage cable before the drywall goes up saves you at least three trips to the attic. A remote control pergola roof lets you adjust louvers or retract fabric with a button, and when tied into your smart home, it can respond to rain sensors or sun angle automatically. Here's what you need to know before your contractor buttons up the walls.
What Is a Remote Control Pergola Roof?
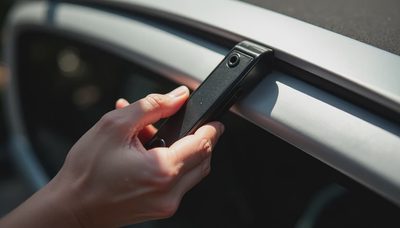
A remote control pergola roof uses motorized louvers, retractable fabric, or sliding panels that you operate with a handheld remote, wall switch, or smartphone app. The motors are typically 24V DC or 120V AC, and the control wiring runs from the motor back to a control box inside your home. Common brands include Somfy, Lutron, and Awntech. These systems are sold as kits or custom-built. The key difference from a manual crank system is the low-voltage cable you'll need to run from the pergola frame to your equipment room.

Benefits of a Motorized Pergola Roof
- **Convenience:** Adjust shade without getting off the couch or going outside in the rain.
- **Weather protection:** Many systems close automatically when wind or rain is detected, saving your furniture.
- **Energy savings:** Blocking direct sun in summer can cut cooling costs by 10–20% on that side of the house.
- **Smart home integration:** Works with Alexa, Google Home, or HomeKit if you choose a compatible motor and controller.
The time to decide is before your patio foundation is poured. Concrete and stone are hard to trench through later.
Wiring and Installation Considerations
This is where the worksite wisdom comes in. A **remote control pergola roof** requires two things from your electrician: a power source and a data cable. Most installers run a 14/2 low-voltage wire from the motor location to a junction box inside the garage or a structured media enclosure. If you're planning multiple motors (one for each louver row), you'll need a separate home run for each. **Don't daisy-chain motors** on a single wire unless the manufacturer explicitly allows it—overload can cause intermittent failures.
Also plan for the control box location. It should be accessible but out of direct weather. A utility closet near the patio door works well. Label every cable at both ends before the drywall crew shows up. Trust me, I've cut this drywall open twice because I forgot which wire went where.
If you're using a smart home system like Lutron RadioRA or Somfy myLink, run an additional Cat6 cable from the control box to your network switch. That gives you wired reliability over Wi-Fi for the controls.

Smart Home Integration Options
Most modern **remote control pergola roofs** can connect to your home automation system. Somfy's TaHoma hub works with Z-Wave and allows scenes (e.g., "Summer Entertaining" closes the roof at 30% and dims the string lights). Lutron's Sivoia QS shades can integrate with their lighting system for a unified look. If you're a DIYer, look for motors with dry-contact inputs that can be triggered by a smart relay like a Shelly1. That lets you control the roof from any smart home platform without paying for a proprietary hub.
Step-by-Step Installation Overview
- **Pre-wire:** Run low-voltage cable from pergola frame to control box location. Use 18/4 or 16/4 stranded wire for most motors.
- **Mount motors:** Attach to louver pivot points per manufacturer instructions. Test rotation before installing louvers.
- **Connect control box:** Wire power supply and communication cables. Label all terminals.
- **Test with remote:** Verify each motor moves freely and stops at the correct limits.
- **Integrate with smart home:** Pair the controller with your hub and create scenes.
- **Final louvers installation:** Reinstall louvers and confirm clearance.
Maintenance and Troubleshooting Tips
Even the best **remote control pergola roof** needs occasional care. Motors typically last 5–10 years, but dust, moisture, and UV can shorten life. Here are actionable tips:
- **Lubricate louvers annually:** Use a silicone-based lubricant on pivot points. Avoid WD-40—it attracts dirt.
- **Check weather seals:** If your system uses gaskets around the louvers, inspect them each spring. Replace if cracked to keep water out of the motor housings.
- **Test rain sensors:** Many systems have automatic close when rain hits. Pour a cup of water on the sensor to verify it triggers correctly.
- **Wi-Fi interference:** If your app stops responding, check if your router is too far. A mesh network or wired Cat6 to the controller solves dropout issues. I've seen clients frustrated by weak signals—run a cable and never think about it.
- **Battery in remote:** Some remotes use coin cells; keep spares. If the remote works but the app doesn't, the motor is fine—it's your network.
- **Professional inspection every 2 years:** An electrician can check wiring connections and motor brushes. Catastrophic failures often start with small voltage drops. Catching a loose terminal early saves a $400 motor replacement.
One common mistake homeowners make: they install the control box in the attic, which gets extreme temperatures. Mount it in a conditioned space—the garage or interior closet—to extend electronics life.
Conclusion
A **remote control pergola roof** is a worthwhile project if you plan ahead. The wiring is straightforward—just low-voltage and data—but you need to think about it before the walls close. Ask your electrician to stub out a conduit from the pergola area to your equipment room. You'll thank yourself later when you're lounging on the patio and a rain cloud rolls in. Have you installed one of these? What motor brand did you go with? Let’s hear your experience in the comments.

No letters yet — pray write the first.