
You’re standing in your backyard looking at a plan for a new pergola. Maybe you’ve already sketched out the post locations and chosen the lumber or aluminum. But if you want a **pergola motorized roof**—the kind that opens and closes with a button or a voice command—the time to think about wiring is now, not after the concrete is poured and the structure is up. Trust me: I’ve had to cut open a ceiling twice because I forgot to pull a low-voltage cable. Don’t be that person.
A **pergola motorized roof** isn’t just a fancy add-on. It’s a system that needs power, control wiring, and sometimes network connectivity. If you’re building a new home or doing a major renovation, the rough-in stage—when the studs are still exposed—is your only chance to run the necessary lines without ripping into finished surfaces later. Here’s what you need to know before the drywall crew shows up.

Why Plan for a Motorized Roof Before the Rough-In?
Many homeowners assume they can add a motorized pergola roof after the structure is built. In theory, yes—you can retrofit. But retrofitting means surface-mounted conduit, exposed wires, or expensive trenching to bring power from the house. If you plan during rough-in, you can bury conduit underground or run it through the wall cavity before the drywall goes on. That gives you a clean, invisible installation.
More importantly, a **pergola motorized roof** often requires both line-voltage (120V) for the motor and low-voltage for the control system. Separate conduits may be needed for each. Running them now is cheap. Running them later is a headache. Plus, if you ever want to integrate the roof with your smart home—think voice control via Alexa or a scene in your home automation system—you’ll want a data cable (Cat6) or at least a structured wiring pathway.
What Wire and Conduit to Run for a Pergola Motorized Roof
Here’s where the details matter. I recommend running two separate 1-inch PVC conduits from your main electrical panel (or a junction box inside the house) to the pergola location. One conduit carries the 120V power for the motor and any outlets you might want under the pergola. The other carries low-voltage control wires, speaker cables, or network cables. PVC is cheap, easy to work with, and protects the wires from moisture and critters.
For the power circuit, use 12-gauge THHN wire on a 20-amp breaker, unless the motor manufacturer specifies otherwise. Most residential pergola motors draw about 2–5 amps, so 15 amps is usually enough. But a 20-amp circuit gives you room for lighting, a ceiling fan, or a future outlet. For the low-voltage side, pull 18/4 shielded cable or two Cat6 cables. The shielded cable handles motor control signals (open/close/lock), while the Cat6 covers network and sensor data. Label both ends before the drywall goes up. Future you will thank you.
Motor Options and Control Systems
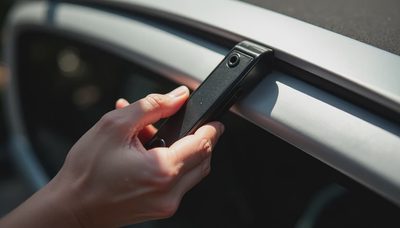
There are generally two types of motors for a **pergola motorized roof**: tubular motors (hidden inside the beam or louver) and chain-driven motors (mounted externally, usually less attractive). Tubular motors are quieter and more discreet, but they cost more. I prefer Somfy or Hunter Douglas brands—they offer wired and wireless options. If you go wireless, you still need power at the pergola. Don’t let anyone talk you into only wireless and skipping the conduit. Batteries die, and smart integration is smoother with a permanent connection.
For control, you have choices: a simple wall switch, a handheld remote, or a smart hub interface. If you want it tied into your home automation, specify a dry-contact relay or a Z-Wave module at the rough-in stage. Run an extra Cat6 to the pergola for future-proofing. That way, when you decide to add a weather station or a rain sensor that automatically closes the roof, you have the wire already.

Common Mistakes to Avoid
I’ve seen it all. The number one mistake is forgetting to run a ground wire to the pergola. Even if the structure is aluminum or wood, the motor needs a proper equipment ground. Second mistake: using only one conduit. If the low-voltage cable shares a raceway with power lines, you can get interference on the control signal. Third mistake: skimping on conduit size. Use at least 1-inch—you’ll thank me when you need to pull an additional wire later. Fourth: not burying the conduit deep enough. In most areas, 18 inches below grade is code. Check local requirements. And finally, do not forget to include a disconnect switch or a GFCI-protected outlet for the motor. Code requires it, and it makes troubleshooting easy.
A **pergola motorized roof** is a luxury, but it doesn’t have to be complex if you plan ahead. During your next budget review, add $200–$500 for the wiring and conduit—pennies compared to the cost of retrofitting. Tell your electrician you want a “smart pergola prep” and show them this article. They’ll know what to do.
Final Checklist for Your Electrician
Before the insulation goes in, run through this list:
- Two 1-inch PVC conduits from house to pergola location
- 12-gauge THHN wires in one conduit with a 20A breaker
- 18/4 shielded cable and two Cat6 cables in the other conduit
- Bury conduit at least 18 inches deep, with a sweep at each end
- Leave 6 feet of extra wire coiled at both ends for termination
- Install a GFCI outlet under the pergola (even if not used, it’s a code requirement in some areas)
- Label all wires with permanent marker and tape them to the conduit
Once the pergola structure is built, mounting a **pergola motorized roof** becomes a simple afternoon job for a pro. You’ll just connect the wires, mount the motor, and program the remote. Meanwhile, your neighbors will be wondering how you got such a clean install.
Remember: the time to run this wire is when the studs are still singing. Ask your electrician about this before they button up. A little planning now saves you cutting drywall twice—and that’s a win any homeowner can appreciate.


No letters yet — pray write the first.