Here’s a sentence you never want to say out loud, standing in your finished living room, holding a stud finder that’s lying to you: “I swear there was a junction box right here.”
I said it. More than once. And every time, I felt like an idiot. Because I had the photos. I just didn’t take the right photos. I took the “look at my progress!” shots – wide angles, proud poses, a few close-ups of the neatest conduit runs. What I didn’t take were the forensic photos. The ones you need when you’re trying to trace a wire through a finished wall, or figure out which stud that low‑voltage plate is actually mounted to, or confirm that the electrician actually left a pull string in the media conduit.
So before your painter shows up – before the walls close forever – let me walk you through the photo‑walk that will save your sanity. I’ve rebuilt this list from my own regrets and from the collective wisdom of everyone who’s been through it. Use it like a checklist.
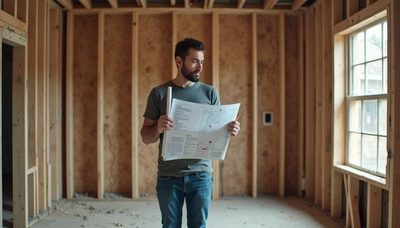
Why now, before paint?

Paint isn’t the enemy. Drywall is. Once the drywall is up and taped and mudded, you can’t see the framing anymore. You can’t see which side of a stud a cable runs on. You can’t see how deep a box is set. You can’t see whether the electrician left a service loop or just terminated flush.
Paint comes after drywall. So your window is: before the drywall goes on. If you’re reading this and your drywall is already hung, stop reading and go look at your photos – if you don’t have them, bookmark this for your next renovation.
The pre‑paint photo walk: a room‑by‑room checklist
Don’t just wander around with your phone. Be systematic. Do one room at a time, and for each room, capture these categories.
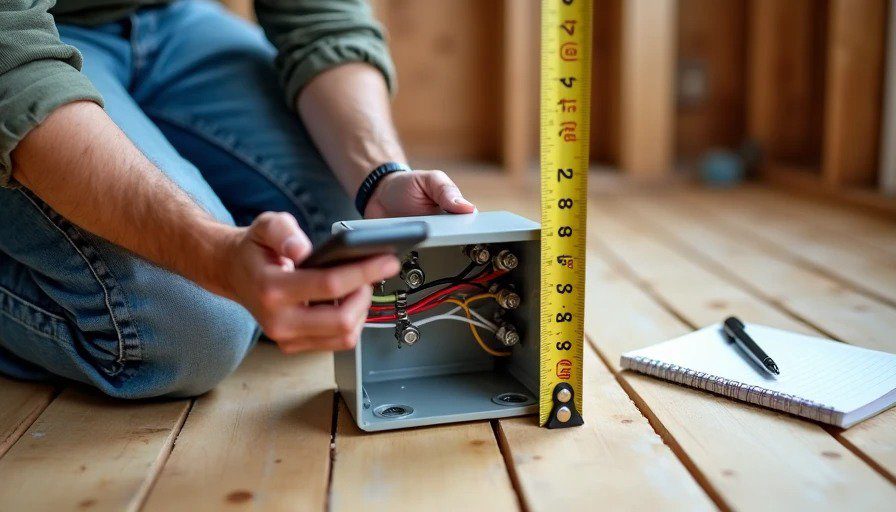
1. Every junction box – the inside story
What to shoot: Open the box. Take a straight‑on, well‑lit photo of the inside, showing:
The wire colours and gauges entering the box
The wire nut configuration (what’s tied to what)
Any labels written on the sheathing
The box depth (if it’s a 3‑inch vs 2‑inch box)
The brand or model if it’s a specialised box (like a weatherproof or fan‑rated box)
Why it matters: Six months from now, when you’re installing a dimmer and realise you don’t know which wire is the line and which is the load, you’ll wish you had this photo. Also, if an electrician ever needs to service it, they can look at the photo and know what they’re dealing with without pulling the box out.
What I forgot: I forgot to photograph two boxes that were behind a built‑in cabinet. I figured “I’ll remember.” I didn’t.
2. Cable runs – the path, not just the endpoints
What to shoot: For each cable run, take a photo that shows:
The cable leaving the panel or junction box
The route it takes (along the top plate, through a drilled stud, across a joist)
Any points where it changes direction (bends, corners, or through‑holes)
The endpoint termination
Why it matters: When you’re trying to fish a new cable later, knowing exactly which path the existing cable takes – and whether there’s a stud, a pipe, or a fire block in the way – is invaluable.
What I forgot: I forgot to photograph the cable run from the basement to the attic. It goes through a chase that I now can’t see. When I wanted to add a second Cat6 line, I had no idea where the chase actually was. I guessed. I was wrong.
3. Conduit ends – proof that the pull string is still there
What to shoot: For every conduit run, photograph:
The endpoint, showing the conduit termination, the pull string protruding, and any labelling on the conduit itself.
The general area around it, so you can find it later (e.g., “conduit ends at the top of the south‑facing wall in the living room, behind the future TV mount”).
Why it matters: Pull strings get lost. They get cut. They get tucked too far in and you can’t reach them. Having a photo that shows exactly where the conduit terminates, and what condition the pull string is in, saves you from fishing blindly.
What I forgot: I forgot to photograph the conduit that runs from the panel to the carport for a future EV charger. When I finally installed the charger, I spent 20 minutes trying to find the end of the conduit – it had been tucked behind a vapour barrier. A photo would have saved me that time.
4. Low‑voltage plates and device locations

What to shoot: For every low‑voltage plate (for network, coax, audio, etc.):
A photo of the plate itself (still attached to the stud) showing the bracket, the ring, and the termination.
A photo of the general area with a tape measure in the frame, showing the distance from the floor and from the nearest corner.
Why it matters: You might think you’ll remember exactly where that network plate is on the wall, but after drywall and paint, it just looks like a white rectangle. The photo tells you which side of the stud it’s on, how deep the bracket is set, and whether there’s enough clearance for the keystone you planned to use.
What I forgot: I forgot to photograph the network plate in the home office. I had planned to put a desk directly under it, but after drywall, I realised it was about six inches off centre. I could have moved the bracket before drywall if I’d looked at the photo and measured. I didn’t. Now my cable comes out of a wall plate that’s visually off‑centre. It bothers me more than it should.
5. Distance references – the tape measure trick
What to shoot: For every key location – boxes, conduits, plates – put a tape measure or a ruler in the frame. Show the distance from the floor, the corner, the window, or any other permanent feature.
Why it matters: Digital cameras don’t preserve scale. A photo of a box on a stud tells you it’s on a stud – but not which stud, or how far up, or how far from the edge. A photo with a tape measure tells you exactly where that box is within an inch.
What I forgot: I didn’t use a tape measure for most of my shots. I thought “I’ll remember.” I didn’t. And when I had to cut a hole for a new outlet, I was guessing.
6. The wall cavity – what’s in the background
What to shoot: For every photo you take, don’t just frame the object. Step back and take a wide shot that shows the object in context – the studs, the insulation (if it’s not fully covered), the structural members.
Why it matters: Knowing exactly where a junction box is relative to the rest of the wall is crucial for later troubleshooting. A close‑up of the box tells you what’s in it. A wide shot tells you where it is.
What I forgot: I forgot to take wide shots in the basement. I had three junction boxes on the same wall, but without a wide shot, I couldn’t tell which one was which when I saw the drywall. I ended up cutting a test hole – not ideal.
7. The panel – the map of the house
What to shoot: Before the drywall goes up, photograph:
The panel itself, with the door open, showing the breaker labels.
The wiring inside the panel, showing how the circuits are routed and where they exit.
The panel schedule, if you’ve filled it out (even in pencil).
Why it matters: When you’re trying to trace a circuit, you need to know which breaker feeds which room, and which wire goes where. A photo of the panel (especially with a tape measure showing the distances) gives you that map.
What I forgot: I forgot to photograph the panel after the electrician finished, but before the drywall. He had installed a bonding jumper that I later questioned – but I had no photo to confirm what it looked like originally.
The one photo I wish I’d taken
If I have to pick the single most valuable photo I didn’t take, it’s a photo of every junction box with the cover removed, showing the wire colours, with a tape measure showing the distance from the floor, taken from two angles – straight on and at 45 degrees.
I took some of those. I didn’t take all. And the one I missed – in the kitchen island, behind a drawer – cost me an hour of dismantling cabinets to figure out which wire was which when a circuit tripped.
Practical tips for your photo walk
Do it with a partner. One person holds the phone, the other holds the tape measure and calls out distances. Faster and more accurate.
Use a whiteboard. Write the room name and date on a small whiteboard and include it in each shot. Future you will thank you.
Take photos even for things you think are obvious. They won’t be obvious in six months.
Upload them immediately. Don’t let them sit on your phone. Put them in a dedicated folder with a clear name, e.g., “RoughIn_Photos_2026_10_18”. Back them up to the cloud.
Tag them. Use keywords like “junction box”, “conduit”, “low voltage” so you can search later. Google Photos and iCloud both allow text search of photo content.
What I wish I’d shot – the final list
Category | What to shoot | What I forgot |
|---|---|---|
Boxes | Inside, with wire colours and labels | Two boxes behind a cabinet |
Cable runs | Entire path, not just endpoints | The basement-to-attic chase |
Conduit | Ends with pull string visible | EV charger conduit end |
Low-voltage plates | Bracket, ring, and location with tape measure | Home office plate, off-centre |
Distances | Tape measure in every shot | All of them – I used a tape measure but not everywhere |
Wall cavity | Wide shots showing context | Basement junction boxes |
Panel | Inside with labels and distances | After the electrician finished |
Special requests | Anything you might need later | Wall thickness at each plate |

No letters yet — pray write the first.